My dad says navigation is the most undervalued survival skill. My dad is right about a lot of things, and this is one of them.
Here’s the math that bugs me: your phone battery lasts maybe 6-8 hours with heavy use. A compass can last decades if you don’t lose it. But the night sky? Available every clear night for the rest of your life, at zero cost, zero battery life, and it’s been there for every human who ever needed to find north since before Homo sapiens existed.
And yet most people couldn’t identify Polaris — the North Star — if their survival literally depended on it.
I’m Zane, the youngest Bridger and the one who built a weather station in the backyard and has been tracking barometric pressure for two years because it’s interesting. Navigation is my other thing. My dad covers the basics in his wilderness navigation guide, but this piece goes deep on specifically how to use the stars — which is the part I find most fascinating and the part most people skip.
Practice First: Always practice survival techniques in safe, controlled conditions before relying on them in an emergency. Tell someone your plans before heading into the backcountry. Carry appropriate emergency communication devices.
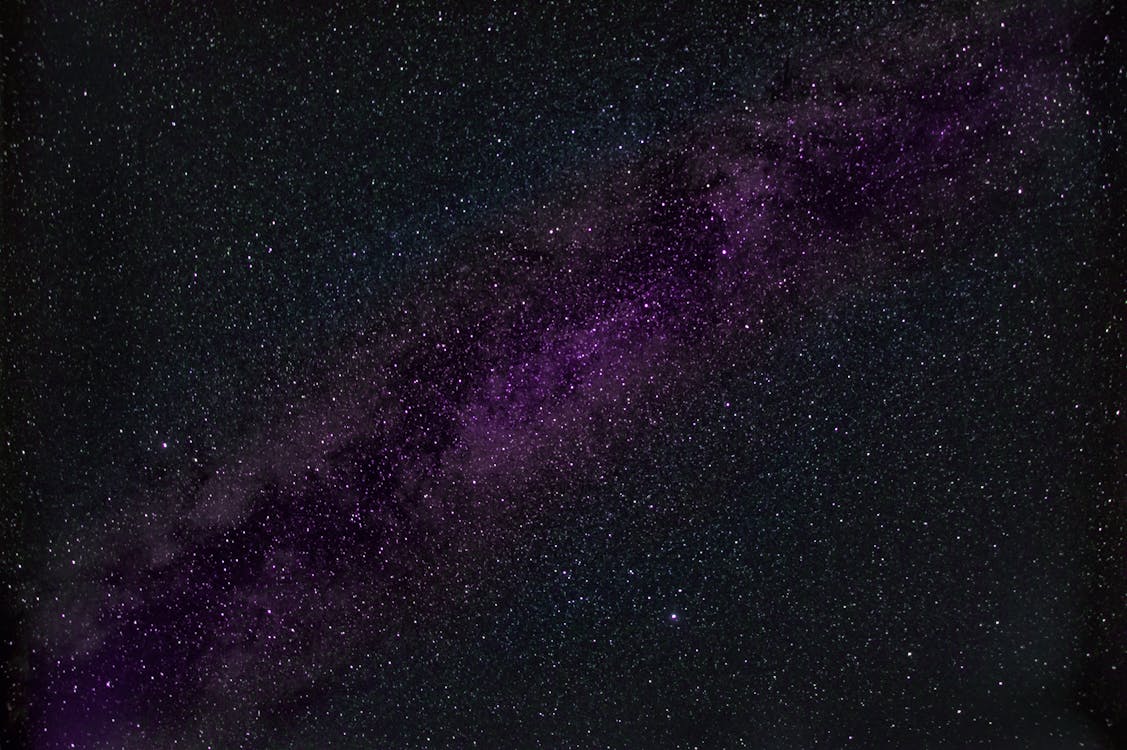
Why Celestial Navigation Still Matters
A few numbers first, because that’s how I think about things.
Polaris stays within approximately 0.74 degrees of true north. That’s remarkably precise for something that costs nothing and requires zero equipment. Compare that to a cheap compass, which can have up to 5 degrees of error. Your phone’s GPS is accurate to maybe 3-5 meters horizontally — impressive, but only while it has satellite lock and battery power.
Celestial navigation is reliable in a way that electronics aren’t. It doesn’t degrade. It doesn’t need updates. It’s never out of range. And unlike compass navigation, it can’t be messed up by nearby metal objects or magnetic anomalies. There are places in the US where local iron deposits cause compass errors of 20 degrees or more — enough to walk significantly off course over a mile.
I’m not saying you should rely exclusively on star navigation. Layered navigation — compass primary, map secondary, celestial as backup and verification — is smarter than any single method. But knowing how to use the stars means you have a backup that literally cannot fail unless it’s overcast.
Finding Polaris: The 90-Second Method
Polaris is not the brightest star in the sky. That’s the #1 misconception. Polaris is actually about the 50th brightest — noticeable, but not dominant. Finding it correctly requires knowing where to look, not just scanning for brightness.
Step 1: Find the Big Dipper.
The Big Dipper (technically an asterism within Ursa Major) is visible from the northern hemisphere essentially year-round, though it rotates around Polaris over the course of the night and year. It looks like a large ladle or cooking pot with a handle. Seven stars, easy shape. Once you know what you’re looking for, you’ll spot it in seconds.
If you can’t see the Big Dipper directly (it dips below the horizon at certain latitudes and times), look for Cassiopeia instead — five stars in a W or M shape. More on that in a moment.
Step 2: Find the pointer stars.
The two stars at the outer edge of the Big Dipper’s “bowl” (not the handle end) are called Dubhe and Merak. They’re called the pointer stars for a reason. Draw an imaginary line from Merak (the bottom of the bowl’s outer edge) through Dubhe (the top), extending that line about five times the distance between those two stars.
That line points almost exactly to Polaris.
Step 3: Confirm with Cassiopeia.
Cassiopeia sits roughly opposite the Big Dipper across Polaris. When the Big Dipper is high, Cassiopeia is low, and vice versa. Polaris sits almost exactly between them. If your candidate for Polaris is flanked by the Big Dipper on one side and Cassiopeia on the other, you’ve got the right star.
The full process takes maybe 90 seconds once you’ve practiced it a few times. First time, maybe 10 minutes while you build the mental image. After that, it’s fast.
Pro Tip: Learn these constellations from your backyard on clear nights at home, not for the first time in an emergency. Go outside on a clear night this week. Give yourself 20 minutes. You’ll have it.
Polaris Is NOT the Brightest Star — Don't Scan for Brightness
The most common mistake beginners make is looking for the brightest star in the sky. Polaris is roughly the 50th brightest and blends into the background. Venus and Jupiter are dramatically brighter and sit near the horizon — they don’t twinkle and are almost certainly not Polaris. Find Polaris by following the pointer stars from the Big Dipper, not by scanning for brightness.
Using Polaris to Navigate North
Polaris doesn’t move relative to your position the way other stars do (they appear to rotate around it over the course of the night). Stand facing Polaris and you’re facing approximately true north. Simple.
For more precise navigation:
The shadow stick method (daytime supplement): This doesn’t use stars, but I’m including it because it gives you the same directional information during the day. Plant a stick vertically in flat ground, mark the tip of its shadow. Wait 15 minutes. Mark the tip again. The line from the first mark to the second mark runs roughly east to west. The first mark is west. Simple geometry from sun movement.
Walking a bearing at night: Pick a star that’s close to your intended direction of travel, not Polaris itself. Polaris is good for establishing your orientation, but walking directly toward it means you’re walking north. If you want to head northeast, find a bright star that’s northeast of Polaris and use it as your walking beacon. Check your orientation every 15-20 minutes because stars do drift slightly due to Earth’s rotation.
Estimating latitude: Here’s the genuinely useful data point. The altitude of Polaris above the horizon is approximately equal to your latitude. If Polaris appears 45 degrees above the horizon, you’re at roughly 45°N latitude. Not precise enough for navigation by itself, but useful for cross-checking map reading. In the northern US, Polaris is generally 35-50 degrees above the horizon. That’s roughly 35 to 50 degrees of arm span (a closed fist held at arm’s length = about 10 degrees).
Use a Navigation Star Instead of Polaris When Walking a Bearing
Walking directly toward Polaris means walking due north, which is rarely your intended direction. Instead, once you’ve established north from Polaris, identify a bright star in the direction you actually want to travel. Use that star as your walking beacon and recheck your orientation every 15-20 minutes as it drifts. This is faster and more accurate than constantly recalculating from Polaris.
What to Do When You Can’t See Polaris
Polaris may be blocked by trees, terrain, or overcast sky. Other approaches:
Use Cassiopeia. Find the W-shape, find the midpoint of the W, and draw a perpendicular line from that midpoint outward. It points roughly to where Polaris would be. Not as precise as using the pointer stars, but gets you in the ballpark.
Orion’s Belt. Three stars in a nearly-perfect straight line — easily recognized by anyone who’s spent ten minutes stargazing. Orion’s Belt rises due east and sets due west, regardless of where you are. If you watch where a star from the belt rises or sets, you have a reliable east-west reference. More on this below.
Moon and stars together. A half-moon gives you directional information. If the moon is waxing (right side lit), the lit side faces roughly south at its highest point. Waning moon (left side lit) means it faces roughly north at its highest point. This is approximate, but in combination with other indicators it helps.
The Orion Method for East-West
Orion is visible from both hemispheres and recognizable to pretty much anyone who’s looked at a clear winter sky, roughly from November through April in the northern hemisphere (May through August in the south).
The three stars of Orion’s Belt — Alnitak, Alnilam, and Mintaka — rise almost exactly due east and set almost exactly due west everywhere on Earth. The deviation is under 2 degrees at most latitudes. That’s better than many compasses.
Watch where the leftmost belt star (Mintaka) rises from the horizon. That point on the horizon is within about 1-2 degrees of true east.
If Orion isn’t visible (winter or summer depending on your hemisphere), any star rising near the east horizon will drift roughly east to west over the course of the night. Watch the direction of star movement using a landmark on the horizon as reference. Stars moving from left to right? You’re facing roughly south. Moving from right to left? Facing north. Rising and falling without significant drift? Facing east or west.
Southern Hemisphere Navigation
Worth covering briefly because North American readers don’t always think about this, but if you’re ever in Australia, New Zealand, South America, or southern Africa — Polaris is not visible or barely visible.
Down there, the Southern Cross (Crux) is your reference. Four main stars in a cross shape, more compact than the Big Dipper. The long axis of the Southern Cross points roughly toward the south celestial pole, but the south celestial pole doesn’t have a bright marker star the way north has Polaris.
Method: extend the long axis of the Southern Cross about 4.5 times its length in the direction it points. That endpoint is approximately the south celestial pole. Face that direction and you’re facing south.
Also useful: find the two bright stars called the Pointer Stars (Alpha Centauri and Beta Centauri, just outside the Southern Cross). Draw a line perpendicular to the line between them, aiming toward the cross. That also triangulates approximately to the south celestial pole.
Less clean than northern navigation, but workable once you practice it.
Estimating Time from Stars
Bonus knowledge that’s genuinely useful in the field.
The Big Dipper rotates counterclockwise around Polaris once every 24 hours. More precisely, once every 23 hours and 56 minutes (one sidereal day). That’s close enough to a standard clock for practical purposes.
If you observe the Big Dipper’s handle pointing straight up, it’s approximately midnight at your location (this varies by season and location, but it’s a rough reference). Pointing right: roughly 6 AM. Down: roughly noon. Left: roughly 6 PM. This is approximate and seasonal variation matters, but as a rough “is it more like 2 AM or 5 AM” check, it works.
For a more precise star clock: the app method is cheating (use it when you have battery). The manual method requires knowing the position of the vernal equinox and some math I’ll save for another article. For survival purposes, “roughly midnight” is usually enough.
Common Mistakes
Confusing Polaris with Venus or Jupiter. Venus and Jupiter are bright — much brighter than Polaris. They’re visible near the horizon and they don’t twinkle. If you’re looking at something that doesn’t twinkle and is incredibly bright, it’s almost certainly a planet, not Polaris. Polaris twinkles like other stars.
Not confirming with a second method. If you think you’ve found north via Polaris, check against the shadow stick method if it’s dawn or dusk. Celestial navigation improves with layering — any two methods pointing the same direction gives you much higher confidence.
Trying to learn during an emergency. I said this in the pro tip above but it deserves repetition. Learning star navigation requires several clear-sky practice sessions. Go outside and practice now, while you have your phone in your pocket and nothing depends on it. Build the pattern recognition before you need it.
Walking a straight bearing at night without landmarks. Stars drift. If you pick a navigation star and just walk toward it, you’ll gradually curve. Pick a ground landmark in the direction you want to travel, walk to it, then re-establish your star bearing and pick a new landmark. Navigate in short segments, not in one long straight line.
Losing your night vision. This one’s practical. Your eyes take about 20-30 minutes to fully adapt to darkness. A single glance at a bright light source (phone screen, fire) resets that adaptation. If you’re navigating by stars, protect your night vision. Red light doesn’t impair it — that’s why headlamps with red modes exist.
Looking at Your Phone Destroys Your Night Vision for 20-30 Minutes
Full dark adaptation takes 20-30 minutes and is reset by any bright light — including your phone screen. If you’re navigating by starlight, avoid all white light sources. Use your headlamp’s red mode only, or cover a white headlamp with red cellophane. Losing night vision while navigating in the dark is the difference between confident movement and stumbling around unable to see the stars or the terrain.
Star navigation is one of those skills where the learning curve is front-loaded. There’s a moment — usually after two or three practice sessions — where it just clicks. You look up and the Big Dipper jumps out at you immediately, the pointer stars make sense, and finding Polaris takes seconds. Before that moment it feels hard. After it, it’s easy.
Find that moment in your backyard, on a normal Tuesday night, with your phone in your pocket. It’s worth the 20 minutes.