This article contains affiliate links. If you buy something through these links, we may earn a small commission at no extra cost to you. We only recommend products we’ve personally used and trust. Full disclosure at the bottom of this page.
Daniel Boone National Forest. Kentucky. A three-day solo trip that was supposed to be relaxing.
I dropped my lighter in a creek on day one. Just slipped right out of my jacket pocket while I was crossing on some rocks. Watched it bounce once, land in the water, and sink. Gone. I stood there staring at the spot where it went under like it might swim back up to me.
It did not swim back up to me.
Now. I had a ferro rod in my pack. One of those Light My Fire Swedish FireSteels I’d bought at REI for $12 because a YouTube guy said I should. Had I ever actually used it? Nope. Nope. Practiced with it? Nope. Even taken it out of the packaging before that moment? I think you know the answer.
Spent forty-five minutes crouched over a pile of damp leaves striking sparks that went everywhere except where I needed them to go. My hands were shaking from cold. My tinder bundle was garbage — green leaves and wet bark because I didn’t know the difference between good tinder and bad tinder. The sparks would land and just… die. Every time.
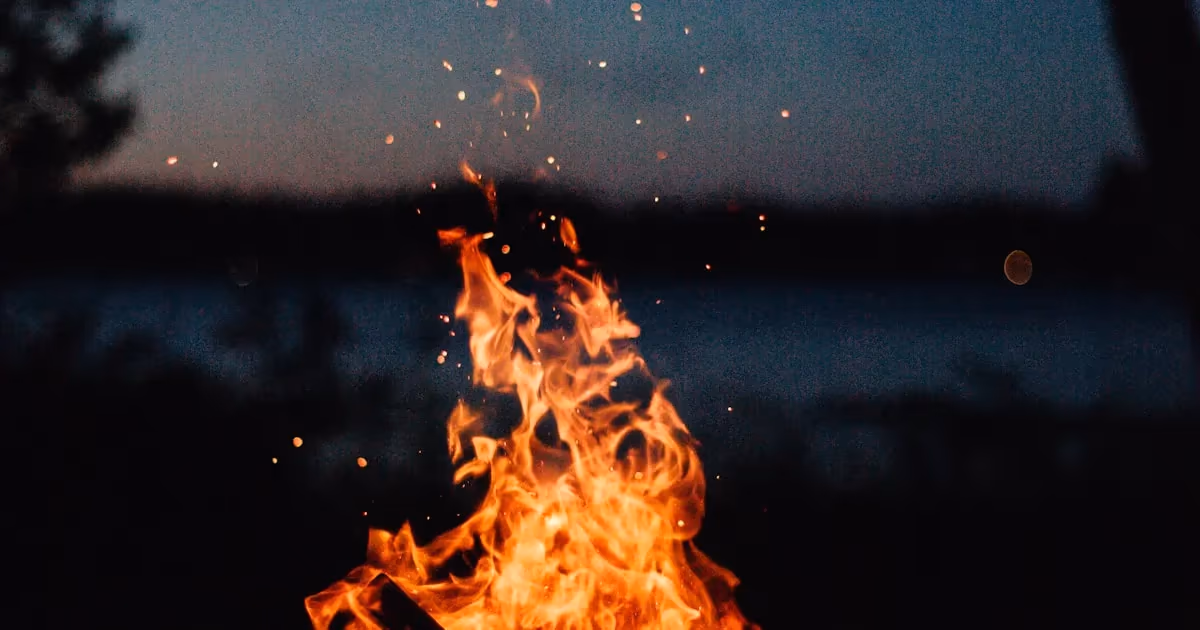
Finally got a fire going. Barely. Used the cotton lining from inside my jacket pocket as tinder, shaved some bark off a dead birch with my knife, and had the world’s most pathetic little flame going just as the sun went down. It took me an hour and eleven minutes. I timed it because I was annoyed and wanted to remember exactly how annoyed I was.
That weekend rewired my brain about fire. Every fire-starting method I’d ever seen online looked easy — a quick flick, a spark, then flame. Ten-second video. What nobody showed was the forty-five minutes of swearing that came before the ten-second success clip.
So here’s what actually works. And more importantly, here’s what fails and why.
Before the Method — The Tinder Matters More
I’m putting this first because this is where I failed that night in Kentucky and it’s where most people fail. You can throw sparks all day. You can generate enough friction heat to cook an egg. Doesn’t matter if your tinder is garbage.
Good tinder is dry, fine, and fibrous. It needs surface area. Think of it like this — you can’t light a log with a match. You can light a cotton ball with a match. The difference is surface area and fineness.
What works:
Dry grass, gathered in a loose ball about the size of a softball. Pull it apart so air can get through it. Air is part of the fire. People pack tinder too tight and smother the ember before it ever becomes a flame.
Birch bark. The papery outer bark of birch trees contains oils that burn even when damp. This saved me in Kentucky. If you’re in an area with birch trees, you’re in business. Peel thin strips — don’t hack chunks off living trees, you’ll kill them and also you don’t need that much.
Fatwood. Resinous heartwood from dead pine trees. The stump of a fallen pine, down near the roots, is often saturated with resin. It smells like turpentine when you shave it. Burns hot and fast even in wet conditions. Finding a fatwood stump is like finding a twenty-dollar bill on the sidewalk. My buddy Chris gets genuinely excited when he finds one. Like, embarrassingly excited. He once yelled “JACKPOT” in the middle of the Pisgah National Forest and scared a family of hikers.
Dryer lint. Seriously. At home, save your dryer lint in a ziplock bag. It’s essentially pre-made tinder. Cotton dryer lint catches a spark instantly. I keep a bag of it in every fire kit I own. Free. Weighs nothing. Works every time.
Char cloth. Old cotton fabric — a cut-up t-shirt works — that’s been charred in a tin with a small hole in the lid. The charring process drives off everything except carbon, and what’s left catches a spark like nothing else I’ve ever used. Making char cloth is a whole process, but once you have it, fire starting gets dramatically easier. A spark from a ferro rod landing on char cloth will glow immediately. Almost guaranteed.
Pack Tinder Before Every Trip — Don't Rely on Finding It
The most common reason people fail with a ferro rod isn’t bad technique — it’s bad tinder. Natural tinder found on the ground is frequently damp, packed, or inadequate. Stuff five petroleum jelly cotton balls into a small ziplock before every trip. They catch sparks instantly, burn for four minutes each, and weigh almost nothing. This one prep item removes the hardest variable from fire starting.
Watch: How to Build a Bow Drill Fire
Method 1: Ferro Rod (The One You Should Learn First)
A ferrocerium rod. This is the method that replaces matches and lighters in my pack. Period. They work wet, they work at any altitude, they work in wind, and they last for roughly 12,000 strikes depending on the rod. You could start fires every day for thirty years and not use one up.
I carry a Bayite ferro rod, 1/2-inch diameter. Cost me $10 on Amazon. The bigger diameter ones are easier to grip and throw bigger sparks than the little pencil-thin ones that come attached to those novelty keychains.
This is where everyone messes up — me included, for the first six months.
Don’t scrape the rod toward the tinder. Pull the rod BACK while holding the striker still over the tinder. Same motion, different direction. When you push the striker forward, your hand follows through and scatters the tinder bundle. When you pull the rod back instead, the sparks fall straight down onto the tinder and your hand moves AWAY from the pile.
This one change — pulling the rod back instead of pushing the striker forward — cut my success rate from maybe one in ten to about eight in ten. And that’s not me being good at it. That’s just physics. The sparks go where you want them to and your hand doesn’t destroy the tinder nest.
Hold the striker at about a 45-degree angle. Short, sharp strokes. Don’t try to take the entire rod in one pass. Use the first inch. Quick, aggressive strokes. You want 5,000-degree sparks landing on dry fibrous material. It WILL catch. If it doesn’t, your tinder is the problem, not the rod.
I make every new person I teach practice this method at least fifty times before I’ll sign off on them going solo. Fifty. Most people get consistent around strike thirty. Some take more. But by fifty, everyone’s got it.
Method 2: Flint and Steel (Old School, Still Works)
Not to be confused with a ferro rod. Traditional flint and steel uses an actual piece of flint — or chert, jasper, quartz, most hard silica-rich rocks work — struck against a high-carbon steel striker.
Sparks from flint and steel are cooler than ferro rod sparks. Significantly cooler. Which means you basically NEED char cloth to catch them. Without char cloth, you’re going to have a very frustrating afternoon. Trust me. I spent two hours at a primitive skills workshop in Asheville trying to catch a flint-and-steel spark on natural tinder and it didn’t happen. The instructor, this old-timer named Warren who’d been doing this for forty years, finally said “son, just use the char cloth.”
So I use the char cloth.
Strike the steel against the flint edge at a sharp angle. The impact shaves tiny pieces of steel off the striker, and those pieces oxidize instantly — that’s the spark. Catch the spark on char cloth held against the flint, just below the strike zone. When the char cloth catches, it glows. Doesn’t flame. Glows. Then you transfer that glowing char cloth into your tinder bundle and blow. Gently. Like you’re blowing on soup that’s too hot. Not like you’re blowing out birthday candles.
Blowing is an art. Too hard, you blow the ember out. Too soft, nothing happens. You want a slow, steady stream of air aimed right at the glow. The tinder bundle should start to smoke, then more smoke, then suddenly — flame. That transition from smoke to flame is among the most satisfying things I’ve ever experienced outdoors. Every time.
Method 3: Bow Drill (The Hard One)
I’m including this because every survival article does and also because it does work. But I need to be honest.
The bow drill is HARD. Like, really hard. Like, I spent two full weekends practicing in my backyard before I got my first successful coal and my wife came outside to see me lying on my back in the grass breathing heavily with blisters on both palms. She asked if I was okay. I said “I made fire.” She said “we have a stove” and went back inside.
Fair.
You need a fireboard, a spindle, a bearing block, and a bow. All from specific types of wood. The fireboard and spindle should be the same species ideally, and it should be a soft, dry wood. Cottonwood, willow, basswood, cedar, aspen. NOT oak. Not maple. Not anything hard. I tried oak my first time because I didn’t know better and all I got was a sore arm and a polished hole.
Physics: you’re using the bow to spin the spindle fast enough against the fireboard to create friction, which creates heat, which creates a tiny coal of wood dust in a notch cut into the fireboard. That coal — if you do everything right — falls through the notch into a little leaf or piece of bark underneath, and you transfer it to your tinder bundle.
Here’s what makes it hard. Everything has to be right AT THE SAME TIME. The wood has to be dry. The spindle has to be straight. The bow string tension has to be perfect — too loose and the spindle slips, too tight and you can’t draw the bow. Your form has to be correct — front foot on the fireboard, wrist locked against your shin, smooth full strokes. And you need to maintain speed and downward pressure simultaneously for maybe sixty to ninety seconds straight.
That said? When it works? When you see that first thin line of smoke curling up from the fireboard and you keep going and the smoke gets thicker and you lift the spindle and there’s a tiny glowing coal sitting in the notch?
Best feeling in the world. Genuinely. I understand why primitive skills people get obsessed with this. There’s something primal about creating fire from wood and string and nothing else.
Wood Selection Makes or Breaks the Bow Drill
The bow drill fails most often because of wood choice, not technique. The fireboard and spindle must be soft, DRY wood — cottonwood, willow, basswood, cedar, or aspen. Hard wood like oak generates heat but not fast enough to coal. Green or even slightly damp wood creates no coal at all. When practicing, get dry cottonwood or willow from a craft store or online until you can evaluate wood quality in the field.
Method 4: Hand Drill (The Really Hard One)
Same concept as the bow drill but without the bow. You spin the spindle between your palms. Just your hands.
Done this exactly twice successfully. Both times it took over fifteen minutes and my palms were raw for two days afterward. I can do it. I don’t enjoy it. And in a real emergency, with cold hands, low energy, and stress? I’m reaching for the ferro rod every single time.
But if you’ve literally got nothing except wood — no tools, no gear, nothing — this is the method that exists for that situation. Just know that it requires significant practice, callused hands, and the right wood.
Mullein stalks for the spindle work well if you can find them. They’re light, straight, and soft enough to generate friction quickly. Yucca, clematis, and cattail stalks also work in different regions.
Method 5: Fire Plow
Another friction method. Simpler mechanics than the bow or hand drill. You take a softwood board, carve a groove down the middle, and plow a hardwood shaft back and forth in that groove using heavy downward pressure. The friction pushes tiny heated wood particles to the end of the groove where they accumulate and eventually form a coal.
I’ve used this method successfully a handful of times. It’s brutal on the arms. Like doing push-ups until you can’t feel your shoulders. But the technique is more forgiving than the bow drill — there’s no string tension to manage, no bearing block to worry about. Just push and pull.
Best wood combo I’ve found: hibiscus or sotol for the board, a harder stick for the plow. In tropical areas, this method is actually pretty practical. In the cold, damp forests of Appalachia where I spend most of my time? The bow drill or ferro rod wins every time.
Method 6: Magnifying Lens
A magnifying glass. Or the lens from binoculars. Or a water bottle filled with clear water (yes, really — this works). Or even a piece of clear ice shaped into a lens.
Focus sunlight into a pinpoint on tinder. Hold steady. Wait. The concentrated light heats the tinder to ignition temperature and it begins to smolder.
Obviously this requires sunlight. Which means it’s useless at night, useless in heavy cloud cover, and useless in dense forest canopy. But on a clear day? It’s almost effortless. I’ve started fires with a cheap plastic Fresnel lens the size of a credit card that I keep in my wallet. Cost me $2 at a hobby store. Works in about thirty seconds on a sunny day.
The water bottle method is a great party trick and also legitimately useful. Fill a clear plastic water bottle completely full — no air bubbles — and use the curved bottom as a lens. It takes longer than a glass lens, maybe two to three minutes, but it works. I showed this to my nephew and he spent the rest of the cookout trying to light things on fire with his Dasani bottle. His mom was not thrilled.
Method 7: Steel Wool and a Battery
Nine-volt battery and fine steel wool. Touch the battery terminals to the steel wool. It ignites instantly. INSTANTLY. Like, startlingly fast. The fine steel filaments complete the circuit, the resistance generates heat, the steel oxidizes, and suddenly you’ve got a ball of glowing steel wool in your hands.
Have your tinder ready BEFORE you touch the battery to the steel wool, because you’ve got maybe five seconds of useful flame before the wool burns out. Drop the burning steel wool into a tinder nest and blow gently.
This is the fastest matchless fire method that exists. I keep a 9-volt battery and a bag of 0000 steel wool in my emergency kits specifically for this. Total cost: about $6. Works in rain, works in wind if you shield it, works every single time without fail. My uncle calls it “cheating.” I call it “being warm.”
Steel Wool and a 9-Volt Battery Is the Fastest Emergency Fire Starter
A 9-volt battery and a pinch of 0000 steel wool ignites in under one second, with zero technique required. Total cost is about $6 and the components weigh almost nothing. Keep them in a separate ziplock in your emergency kit — they work in rain and wind if you shield the ignition. This is the method to reach for when you’re cold, exhausted, or in any situation where speed matters more than elegance.
Which One Should You Actually Learn?
Ferro rod. Learn the ferro rod. Practice it until you can start a fire in under two minutes in dry conditions, and under five in damp conditions. Carry one always.
Then learn the bow drill because the skill matters even if you never need it. The process of learning to bow drill teaches you more about fire, tinder, wood selection, and patience than anything else I know of.
And keep a BIC lighter in your pocket. Every single day. Because surviving isn’t about being tough. It’s about being smart. And the smartest person in the woods is the one who brought three ways to make fire and doesn’t need any of them.
Fire is just one part of wilderness survival. You also need to know how to build an emergency shelter and purify water to stay alive when things go sideways. And make sure your bug out bag has at least three ways to start a fire — redundancy is the whole game.
If you want to test your overall wilderness knowledge, take our wilderness survival basics quiz — fire is just one piece, and you might be surprised where your gaps are.