This article contains affiliate links. We may earn a small commission if you purchase through these links, at no extra cost to you.
I tracked the battery drain on my phone during a four-day backpacking trip last October. GPS navigation, weather app checks, occasional photos. My phone went from 100% to dead in 11 hours and 42 minutes on day one. Not a full day. Not even close.
That’s the problem nobody thinks about until they’re staring at a black screen twelve miles from the trailhead. Your phone is your map, your weather forecast, your emergency communication device, and your camera. When the battery dies, you lose all of that at once. If you’re building out your bug-out bag or thinking about longer-term off-grid living, portable solar charging isn’t optional. It’s math.
And I really like math.
Table of Contents
- The Wattage Math You Need to Understand
- Portable Solar Panels: What the Specs Mean
- Power Banks: Capacity vs. Reality
- My Real-World Charging Tests
- Best Combos by Use Case
- What to Actually Charge (and What to Skip)
- Common Mistakes That Kill Your Efficiency
The Wattage Math You Need to Understand
Before I recommend anything, you need to understand three numbers. This is the part where my brothers zone out but it’s the part that matters most.
Watts (W) = how fast energy flows. A 20W solar panel produces energy twice as fast as a 10W panel. Simple.
Watt-hours (Wh) = total energy stored. A power bank rated at 72Wh can deliver 72 watts for one hour, or 7.2 watts for ten hours. It’s capacity.
Milliamp-hours (mAh) = what manufacturers use to confuse you. A power bank rated at 20,000mAh sounds massive. But mAh without voltage is meaningless. Here’s the conversion: Wh = mAh x Voltage / 1000. Most power banks use 3.7V internal cells. So 20,000mAh x 3.7V / 1000 = 74Wh of actual stored energy.
But there’s a catch. When that 3.7V cell outputs at 5V USB, you lose energy in the voltage conversion. Real-world efficiency is typically 80-85%. So your 74Wh power bank actually delivers about 59-63Wh of usable energy.
That 20,000mAh number on the box? It’s technically accurate. It’s also misleading. The usable number is closer to 16,000-17,000mAh at 5V output. Every single manufacturer does this. It drives me crazy.
Your phone battery is typically 3,000-5,000mAh at 3.7V. My iPhone 15 has a 3,349mAh battery (about 12.4Wh). So a 20,000mAh power bank should charge it roughly 4-4.5 times in practice. Not the 5-6 times the marketing suggests. Close, but not quite.
mAh Ratings Are Misleading — Use Wh for Real Comparisons
Power bank manufacturers advertise mAh because the numbers sound impressive, but mAh without voltage is meaningless for comparing capacity. A 20,000mAh bank at 3.7V internal cells delivers about 59-63Wh of usable energy at USB voltage — not the 74Wh the spec implies. To compare two banks honestly, calculate: mAh × 3.7 ÷ 1000 × 0.85 = usable watt-hours.
Portable Solar Panels: What the Specs Mean
Solar panel ratings are measured under “Standard Test Conditions” — direct sunlight at 77 degrees Fahrenheit, 1,000 watts per square meter of solar irradiance, and the panel angled perfectly perpendicular to the sun. In other words, laboratory conditions you will basically never achieve in the field.
Real-world output is typically 60-80% of the rated wattage. A 20W panel realistically produces 12-16W in good direct sunlight. On a partly cloudy day, drop that to 5-8W. Under tree cover, maybe 2-4W. These numbers matter when you’re planning.
Panel types that matter for portable use:
Monocrystalline panels are the most efficient (20-22% efficiency). They produce more power per square inch than other types, which means smaller and lighter panels for the same wattage. This is what you want for backpacking.
ETFE coating vs. PET lamination. ETFE is tougher, more scratch-resistant, and slightly more transparent (meaning slightly more light reaches the cells). PET is cheaper and works fine for occasional use. For a panel that lives in your pack and gets abraded against gear, ETFE is worth the premium.
USB-A vs. USB-C output. USB-A maxes out at 12W (5V/2.4A). USB-C with Power Delivery can push 18-100W. If your phone supports USB-C PD fast charging (most phones made after 2020 do), a panel with USB-C PD output will charge it meaningfully faster. The difference between 10W charging and 18W charging cuts your charge time almost in half.
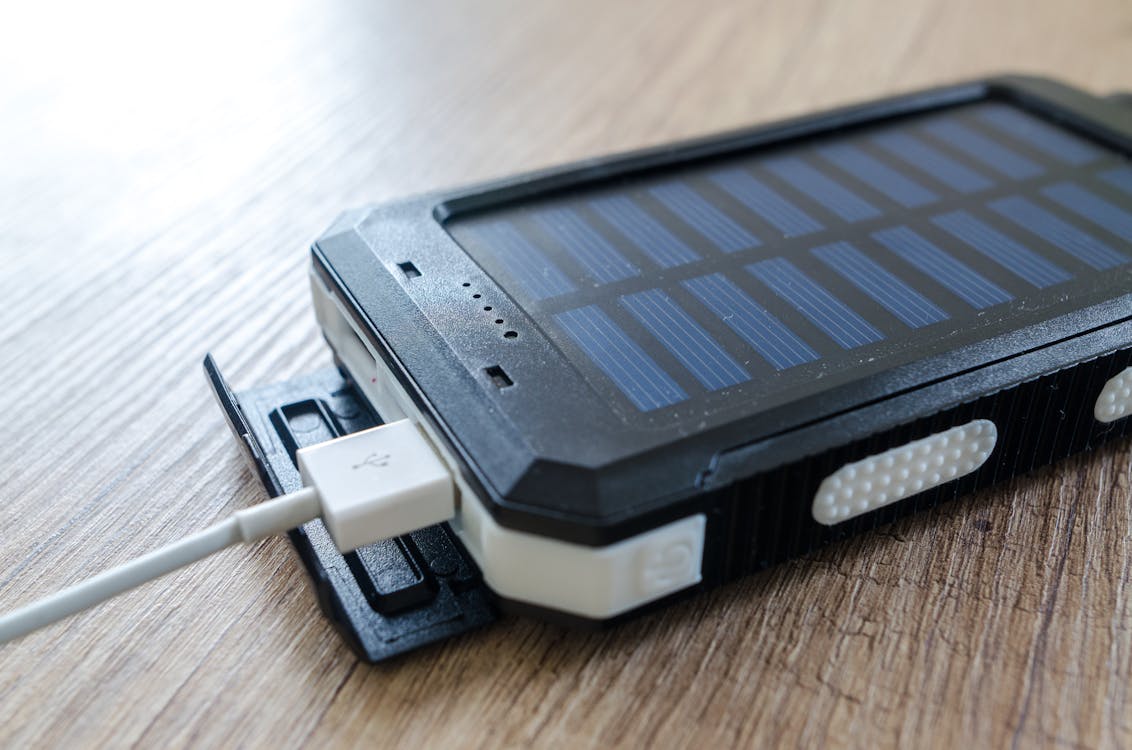
Power Banks: Capacity vs. Reality
Over the last year, five power banks went through my testing gauntlet. Not just capacity, but charge cycles, weight per Wh, and real output under load. Here’s what I found.
The sweet spot for backpacking is 10,000-20,000mAh (37-74Wh). Under 10,000 and you get maybe two phone charges — not enough for a multi-day trip. Over 20,000 and the weight penalty starts hurting. My 20,000mAh bank weighs 12.5 ounces. A 30,000mAh bank weighs about 21 ounces. That extra 10,000mAh costs you half a pound. Not worth it when you can recharge from solar instead.
What I tested:
The Anker PowerCore 20,000mAh ($40-$50). Delivered 16,800mAh of usable output in my test. That’s 84% efficiency, which is excellent. Charged my phone 4.3 times from dead. Two USB-A ports plus USB-C input. Weighs 12.5 oz. This is my primary recommendation for most people.
Next up: Nitecore NB10000 ($35-$40). Only 10,000mAh but weighs just 5.3 oz and is carbon fiber construction. Delivered 8,400mAh usable. 2.2 phone charges. For ultralight backpackers who pair it with a solar panel for daily recharging. The weight-to-capacity ratio is the best I’ve tested.
My daily driver: BioLite Charge 80 PD ($50-$60). 20,000mAh with USB-C Power Delivery at 20W. This is the one I use with my solar panel because the PD input charges the bank faster from solar. Delivered 16,200mAh usable. 11.3 oz. The PD input is the key differentiator.
For base camp: Goal Zero Sherpa 100AC ($180-$200). 25,600mAh with an actual AC outlet that outputs 100W. Can charge a laptop. Weighs 25.6 oz — over a pound and a half. This is for vehicle camping or base camp, not backpacking. It’s incredible but heavy and expensive.
Budget pick: The Baseus 10,000mAh slim ($18-$22). Nothing fancy. USB-A and USB-C output. Delivered 8,100mAh usable in my test. At under $20, it’s hard to argue with for a vehicle kit or backup bank.
My Real-World Charging Tests
For a controlled test, our property in Arizona was the lab. March sun, clear sky, panels laid flat on a south-facing rock at approximately 33 degrees latitude. Temperature 68 degrees F. I measured actual output with a USB power meter every 30 minutes from 9 AM to 3 PM.
Test 1: BigBlue 28W panel ($60-$70) charging Anker 20,000mAh
| Time | Output (watts) | Notes |
|---|---|---|
| 9:00 AM | 14.2W | Low sun angle |
| 10:00 AM | 19.1W | Near peak |
| 11:00 AM | 21.3W | Peak output — exceeded rating |
| 12:00 PM | 22.1W | Maximum recorded |
| 1:00 PM | 20.8W | Slight temperature derating |
| 2:00 PM | 18.4W | Sun angle dropping |
| 3:00 PM | 12.1W | Significant angle loss |
Total energy delivered over 6 hours: approximately 108Wh. The Anker 20,000mAh needs about 74Wh to charge from empty. Result: full charge in roughly 4 hours of peak sun. That’s legitimately useful. One clear day completely replenishes a power bank that charges your phone four times.
Big panel showdown: Anker 625 Solar Panel (100W) ($250-$280)
This is the big one. Not backpackable — it weighs 5 pounds folded and is the size of a large laptop bag. But for car camping or a semi-permanent camp, the output is transformative. Peak measured output: 82W. It charged the Goal Zero Sherpa 100AC (94.7Wh capacity) from empty to full in about 1 hour and 40 minutes of peak sun. That’s enough to charge a laptop plus several phones.
Lighter option: Nitecore FSP100 (100W foldable) ($200-$230)
Lighter than the Anker at 3.7 lbs but slightly less efficient. Peak measured: 71W. Still excellent for car camping. The thinner profile makes it easier to pack.
Reality check — cloudy day (BigBlue 28W)
Same panel, overcast sky. Peak output dropped to 6.8W. Over 6 hours, total energy: about 28Wh. That’s enough to charge a phone once, maybe 1.5 times. Clouds kill solar performance. This is why pairing a panel with a power bank is essential — you bank energy on sunny days for cloudy ones.
Always Pair a Solar Panel With a Power Bank — Never Charge Devices Directly
Charging your phone directly from a solar panel exposes it to fluctuating input: every cloud or change in angle causes the panel output to drop, forcing the phone’s charge controller to restart the handshake and waste time. Charge the power bank from solar first (it tolerates fluctuation), then charge devices from the bank at a steady, efficient rate. This also protects device electronics from voltage instability.
Best Combos by Use Case
Day hiking / emergency kit: Nitecore NB10000 power bank (5.3 oz) + no panel needed. Just charge the bank before you leave. Two full phone charges gets you through any day trip.
Weekend backpacking (2-3 days): BigBlue 28W panel (20 oz) + Anker PowerCore 20,000mAh (12.5 oz). Total weight: 2 lbs. You start with 4+ phone charges stored and can generate a full bank recharge per clear day. That’s effectively unlimited phone power for a weekend trip.
Extended backpacking (5+ days): Same BigBlue 28W panel + BioLite Charge 80 PD. The PD input on the BioLite charges faster from the panel. Total weight: 1.9 lbs. This is my personal setup for longer trips. Keeps my phone, headlamp, and GPS unit all charged indefinitely as long as I get a few hours of sun every other day.
Car camping / base camp: Anker 625 100W panel + Goal Zero Sherpa 100AC. Total weight: about 6.6 lbs (irrelevant for car camping). This setup can charge laptops, run small fans, charge multiple devices simultaneously, and power USB-C devices at full speed. If you’re working toward a full off-grid solar system, this is a great way to learn the principles on a small scale before committing to a permanent installation.
Budget emergency kit: Baseus 10,000mAh ($20) + no panel. Keep it in your glove box or emergency kit. Charge it every 3 months. Two phone charges when you need them. Under $20. No excuses not to have this.
What to Actually Charge (and What to Skip)
Not everything deserves your solar watts. Here’s my priority list, ranked by survival value per watt-hour consumed:
Priority 1: Communication devices. Phone (for calls, texts, GPS, weather). Emergency radio if it’s rechargeable. Satellite communicator (Garmin inReach uses about 2.5Wh per day). These are life-safety items.
Navigation second. Dedicated GPS units draw 1-3W. Headlamps with USB charging draw minimal power. These directly support movement and safety.
Then: Water purification. UV purifiers like the SteriPEN draw about 1.5Wh per liter treated. If that’s your primary water purification method, it needs power.
Priority 4: Lighting. Rechargeable lanterns and headlamps. Low draw, high quality-of-life impact.
Skip: Bluetooth speakers. Portable fans. Anything that’s comfort rather than function when power is limited. I know that sounds harsh. But when your panel is producing 14W and your phone needs 12Wh to charge, every watt going to a speaker is a watt not going to your GPS.
Naturally, a spreadsheet got involved — tracking Wh consumption for every device in my pack. My total daily draw for essential devices on a backpacking trip is about 18-22Wh. The BigBlue 28W panel produces 60-100Wh on a clear day. That’s a huge surplus, which means I can bank power in the power bank for cloudy days. The math works. Comfortably.
Common Mistakes That Kill Your Efficiency
Charging through a device instead of a power bank. Solar output fluctuates with clouds, shade, and panel angle. When a cloud passes and power drops, your phone’s charge controller may restart the charging handshake, wasting time. Charge the power bank from solar (it’s more tolerant of fluctuating input), then charge your phone from the bank at a steady rate.
Leaving the panel flat on the ground. Angle matters enormously. A panel perpendicular to the sun captures up to 40% more energy than one laying flat at midday in the lower 48. I measured this directly. Prop your panel against your pack, a rock, or a stick at roughly your latitude angle (30-45 degrees for most of the US) facing south. This alone can be the difference between charging your phone once or twice in a day.
Angle Your Panel at Your Latitude for a 40% Output Boost
A solar panel lying flat on the ground in the US captures significantly less energy than one angled toward the sun. Prop yours against your pack at roughly 30-45 degrees facing south (equal to your approximate latitude). I measured this directly: the difference between flat and angled can be 35-40% more total energy over a day. A stick or trekking pole prop takes ten seconds.
Buying wattage you can’t use. A 100W panel paired with a power bank that only accepts 18W input wastes 82W. Match your panel output to your bank’s input rating. The BigBlue 28W paired with a bank that accepts 18W USB-C is about right — you lose some to the panel’s real-world output drop, and the bank can absorb everything the panel produces.
Ignoring temperature. Solar cells lose efficiency in extreme heat — roughly 0.4% per degree Celsius above 25C (77F). At 40C (104F), that’s a 6% loss. Not catastrophic, but measurable. On hot days, try to keep the panel ventilated with airflow underneath. Don’t lay it directly on hot rock.
Not testing before you need it. Plug everything in at home. Verify that your panel charges your bank. Time it. Know your actual numbers before you’re in the field relying on assumptions. I test every new piece of gear on the back porch before it goes in my pack. This habit has saved me from two defective USB cables and one panel with a bad solder joint on the output port.
The Bottom Line
Portable solar is real, functional technology right now. Not future-promise stuff. A $60 panel and a $40 power bank gives you effectively unlimited electronic power in the backcountry as long as you get reasonable sun.
Understanding the numbers — not trusting the marketing — is what makes this work. Real output is 60-80% of rated. Real power bank capacity is 80-85% of stated mAh at usable voltage. Factor in those losses and you can plan accurately.
I know this article had more math than most survival content. That’s intentional. The math is what separates a reliable charging setup from one that leaves you staring at a dead phone on day three. Do the calculations once, buy the right gear, and you never have to worry about it again.
That’s a pretty good trade.