This article contains affiliate links. If you buy something through these links, we may earn a small commission at no extra cost to you. We only recommend products we’ve personally used and trust. Full disclosure at the bottom of this page.
Three years ago a neighbor of mine — sweet woman, very organized — told me she’d started prepping. I got excited and asked to see her setup. She led me to the garage and showed me four giant orange buckets from a company I recognized from prepper ads. Twelve thousand dollars’ worth. Purchased on three credit cards.
She’d never touched them. They were sealed. She didn’t own a camp stove. There was no water stored anywhere. And she’d been paying interest on that debt for two years.
I want you to avoid that. Everything about it — the debt, the unused food, the false sense of security, the husband who won’t look her in the eye when the subject comes up.
Building a real prepper pantry doesn’t require a moment of financial panic or a big single purchase. It requires a system. And systems, I’ve learned from my grandma and from several years of actually doing this, work on small consistent actions, not dramatic gestures.
Why the Grocery Store Beats the Prepper Store
I’ve looked at the math enough times to be annoyed by it every time. A #10 can of freeze-dried ground beef runs about $35 and gets you maybe 8 servings — decent if shelf life is your whole concern. But ground beef from any grocery store costs $4-6 a pound, gives you the same servings, and when you process and freeze or can it properly, that beef will keep for a year or two without issue. The freeze-dried stuff does win on that 25-year shelf life, I’ll grant that. But for a budget pantry, you’re paying something like 5x per serving for that longevity.
For most families, a prepper pantry built around normal grocery store food costs about 30-40% of what the same supply would cost buying from dedicated prepper food companies.
The exceptions are things that genuinely need 25-year shelf life and can’t be achieved with normal grocery food — wheat berries, freeze-dried eggs, freeze-dried butter, maybe a case of freeze-dried meals for true emergency use when you’re too exhausted or resource-poor to cook from scratch. Those I’ll still buy from companies like Mountain House or Augason Farms.
But the core of a functional prepper pantry? Grocery store. Every time.
Build a 'Buy More' Price List for Staple Items
Keep a notes app list of your trigger prices for pantry staples — the price point at which you buy extra. Example: spaghetti at $0.89/lb or less, canned tomatoes at $0.75/can or less. This removes in-store decision-making and turns sale shopping into an automatic system. Update the list when your usual prices change.
This connects directly to what I wrote in our complete emergency preparedness guide — the best preps are the ones you’d actually use in normal life. Food storage that doubles as your regular pantry is the most efficient system there is.
The Pantry Framework (How I Actually Think About It)
I divide our pantry into three zones. This mental model helps me shop and helps me maintain it without it becoming a second job.
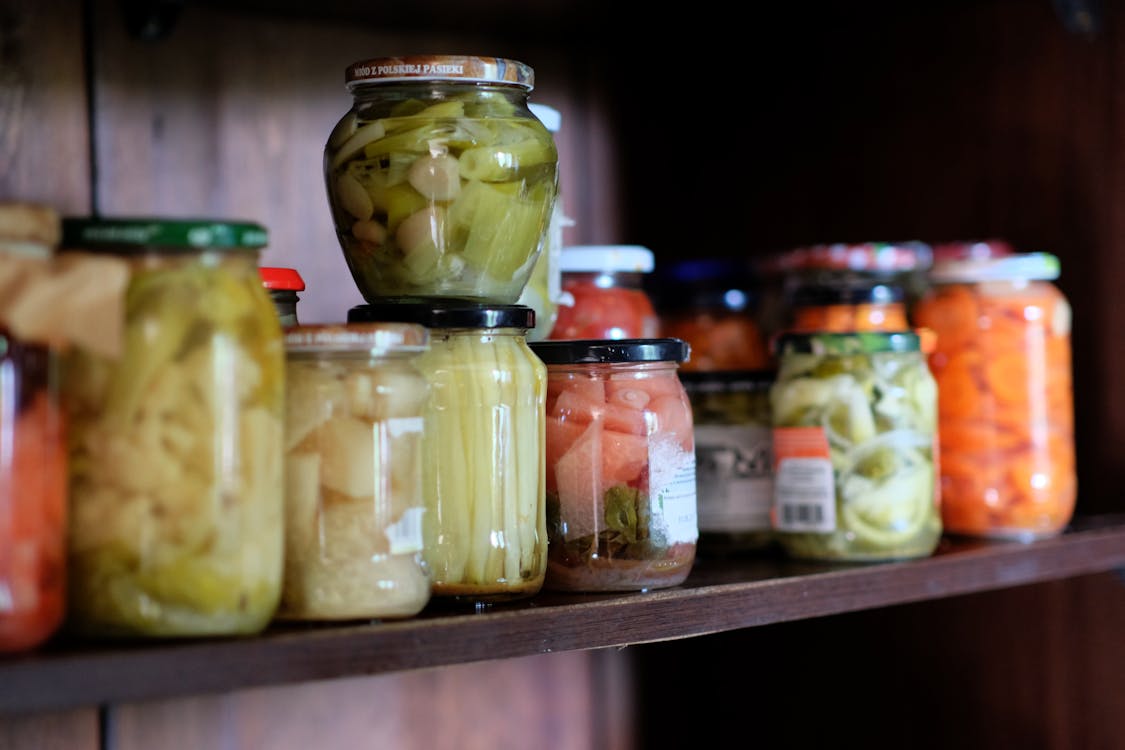
Zone 1: Daily rotation. The stuff we eat every week anyway — pasta, rice, a pile of canned tomatoes, beans, tuna, olive oil, peanut butter, crackers. We’ve always had this stuff. The only prepper change is keeping 2-4 weeks’ worth rather than 3-4 days’ worth, and stocking up when it goes on sale instead of waiting until we run out.
Zone 2: Extended supply. These are foods that last 6 months to 2 years in good conditions. Whole grains in sealed containers, large cans, #10 cans of staples. I rotate these more slowly — maybe every 6-12 months. Instant oatmeal, cream of wheat, cornmeal, dried lentils, white rice in 5-gallon sealed buckets.
Zone 3: Long-term reserve. This is the stuff sealed in mylar bags with oxygen absorbers, tucked in buckets in the back corner — wheat berries, more white rice, dried beans, oats. I almost never crack these open. They sit there and I feel better knowing they’re there. It’s a weird kind of comfort, honestly.
Most budget prepping guides skip Zone 3 and tell you to just buy more of Zone 1. That works fine for 2-4 week supply. For anything longer, you need some Zone 3 foods to give you genuine long-term security without continuous replacement costs.
The Shopping Strategy That Doesn’t Hurt
Here’s what I do, which my grandma would recognize as basic common sense: I buy double when things go on sale.
That’s it. That’s the whole strategy.
Tomato sauce at Kroger for $0.68 a can? I buy twenty instead of four. Peanut butter buy-one-get-one? I grab four jars. Pasta on sale for $0.79 a pound? I buy twelve pounds. Dried beans marked down? I buy fifteen pounds.
Over the course of a year, this approach stocks a pantry without any single shopping trip hurting the budget. I probably spend an extra $30-50 per month on this strategy, and in 12-18 months, we had a genuinely solid six-month supply built largely from foods we already eat.
Pro Tip: Keep a notes app list of your “buy more” prices for staple items. Mine has about 20 items with their normal prices and my “good deal” trigger price. Spaghetti: buy at $0.89/lb or less. Canned tomatoes: buy at $0.75/can or less. This takes the decision-making out of it so I don’t have to think at the store — I just check the list.
The other piece: apps like Flipp and Grocery Pal show weekly circulars for all your local stores. I spend five minutes Sunday morning checking circulars, note what’s on sale, and plan my double-buys accordingly. When Aldi has chicken broth for $0.89 a carton, I walk out with twelve.
The Actual Buy List (Real Items, Real Prices)
I’m going to give you the core of what I buy and approximate prices from early 2026. Your prices will vary by region. These are starting points.
For grains, I start with a 50-lb bag of white rice — about $22-28 at Costco or a restaurant supply store. Add 25 lbs of rolled oats ($15-20), and then pasta bought on sale, usually 15-20 lbs at $0.79-0.89/lb. Cornmeal is cheap and useful; 10 lbs runs $8-10. That covers grains for $60-80.
Proteins: I stock dried pinto beans and black beans heavily — 20 lbs of pintos and 10 lbs of black beans together cost me maybe $20-26. Red lentils are worth adding because unlike most legumes they don’t need soaking and cook in about 20 minutes, so 10 lbs at $10-12 is a good call. Canned tuna by the case (24 cans for $20-24) and a case of canned chicken ($18-22 for 12 cans) round this out for another $40-60.
Fats matter a lot and people skip them. Vegetable shortening stores for years — 6 lbs of Crisco runs $12-14. Two 2-liter tins of olive oil ($20-24 together; tins store better than bottles). Four big jars of peanut butter ($16-20). That’s $30-40.
Sweeteners and baking basics: 25 lbs of white sugar ($16-20), 5 lbs of raw honey ($15-20), 10 lbs of salt ($5-7), baking soda and powder ($5), and 2 lbs of bulk yeast ($8-10). Another $25-35.
Canned fruits and vegetables I build over time through sale buying. Start with 24 cans of tomatoes in different formats — diced, crushed, paste. Then add corn, green beans, mixed vegetables, peaches when they go on sale. Budget $30-40 to start here.
Total initial investment for a solid one-to-two month supply: $185-235. That’s less than a single #10 freeze-dried meat can from some prepper companies.
Containers That Won’t Fail You
Please don’t put 20 pounds of rice in a plastic grocery bag and call it stored. I’ve watched ants figure out grocery bags in under 48 hours. Pantry moths can chew through most plastic bags.
My everyday pantry rotation stuff goes in simple plastic bins with lids — IKEA or the dollar store, whatever’s cheap. I tape a piece of masking tape on the front and write the contents, date, and quantity with a Sharpie. Whole thing takes ten seconds. I spent months not doing this and then spent much longer digging through bins trying to figure out what was in them.
A step up from that is the gamma seal lid on a standard 5-gallon food-grade bucket. You can get buckets free from bakeries — just walk in and ask, most are throwing away dozens every week — or buy them at Home Depot for $4. The gamma lid screws on and costs about $8, but it makes the bucket easy to open and reseal instead of needing a rubber mallet. I fill mine with rice or oats, drop in a bay leaf or two to discourage pantry bugs, and seal it. Good for 2-5 years.
Get Free Food-Grade Buckets From Local Bakeries
Most grocery store bakeries go through dozens of 5-gallon food-grade buckets every week — they typically throw them away after one use. Just ask. Many will give you clean ones for free or charge $1-2. These are perfect for bulk grain storage and are identical to the buckets sold at prepper supply stores for $8-12 each.
For anything meant to sit undisturbed for 10, 20, 30 years, I use 5-gallon mylar bags inside those same buckets with an oxygen absorber dropped in before sealing. Seal the mylar with a hair straightener on high heat along the top edge. The absorber pulls oxygen down to near nothing inside the bag, which stops oxidation and kills most insects in the grain. Rice sealed this way lasts 25-30 years. Oats, even longer. Takes maybe five extra minutes per bucket and it’s worth every second.
One thing I did that saved me a lot of headaches: a simple inventory spreadsheet. Nothing fancy — just a list of what I have, how much, where it’s physically sitting (basement shelf 2 vs. garage cabinet 3), and whether I wrote a date on it when I packed it. Took me 20 minutes to set up the first time. I’ve not bought four jars of peanut butter when I already had six since then, which has happened before.
Mistakes I Made So You Don’t Have To
Storing food I thought we’d eat in a crisis but we never eat normally. My kids don’t like canned beets. They don’t like them fresh either. I have eight cans of beets in my storage because they were on sale and I thought “maybe in an emergency.” No. Emergency situations are not the time to introduce foods your family has already rejected. Store what you eat. Expand slowly.
Don't Store Food Your Family Won't Eat
A pantry full of unfamiliar foods is a morale problem during an emergency, not a solution. Stress, disrupted routines, and physical hardship already strain families — introducing unrecognized foods on top of that compounds the problem. Build your supply around foods your household already accepts, then expand gradually once the baseline is covered.
Not thinking about cooking methods. In 2021 we had a five-day power outage in July. I had plenty of food. I had a propane camp stove and two canisters of fuel. By day three, I was rationing fuel because I hadn’t planned for cooking a full meal three times a day. Now I have a two-burner camp stove and twelve one-pound canisters plus a 20-pound tank with an adapter hose. And I’ve practiced cooking full meals on it, not just boiling water for coffee.
Letting good deals lead me wrong. I bought 40 pounds of split peas because they were incredibly cheap. We like split pea soup maybe three times a year. Forty pounds is about an 8-year supply at our rate of consumption. Balance deals with actual use rates.
Starting too big. The first month I decided to “seriously prep,” I tried to do everything at once and got paralyzed and bought nothing. Give yourself permission to start small. One month’s food first. Then three months. Then six. You’re not trying to survive a zombie apocalypse by Friday. You’re building a system.
What This Actually Looks Like
In our house, the prepper pantry isn’t some separate scary thing. It’s just the pantry, plus some bins in the basement, plus a couple of buckets in the corner of the storage room.
The kitchen pantry has about a month’s worth of regularly rotated food — what we eat every week, just in larger quantities. The basement shelves have maybe three months of extended supply in cans and bins. The corner buckets have our Zone 3 long-term reserve — sealed rice, oats, beans, wheat berries, sugar.
We eat from all of it. Nothing is for “the emergency” — it’s all just food. The emergency backup is the fact that we always have enough.
My kids don’t know they’re eating from a prepper pantry. They know that sometimes dinner is “basement pasta night” when I don’t feel like going to the store, and they think that’s completely normal. It is. It’s supposed to be.
For a deeper dive into long-term food quantity planning, I covered how to store food for a full year in a separate guide with specific quantities and a phased timeline.
And if you want to layer in freeze-dried food as part of your extended supply, I’ve tested the major brands — the freeze-dried food brand comparison is worth reading before you spend $200 on a case of something that tastes like cardboard.
What’s the most useful thing in your prepper pantry that you actually eat regularly? Leave a comment — I’m always looking for new ideas for things we’d genuinely rotate through.