This article contains affiliate links. We may earn a small commission if you purchase through these links, at no extra cost to you.
My water bill hit $187. In JUNE. In Florida. Where it rains almost every afternoon from May through September.
Standing in my yard watching a thunderstorm dump water on my property — probably 2,000 gallons per hour based on my roof size — while simultaneously paying the county $187 to pump water from underground, treat it with chemicals, and send it through pipes to my house so I could water the same garden that was currently being rained on.
Something about that math didn’t work. So I started collecting rain.
Buddy Rick, who lives on 10 acres outside of Brooksville, had been harvesting rainwater for years. He’d been telling me about it at every cookout, every fishing trip, every chance he got. Nodding along and not doing anything about it because my water came from a faucet and that was easy.
But $187 easy? Nah.
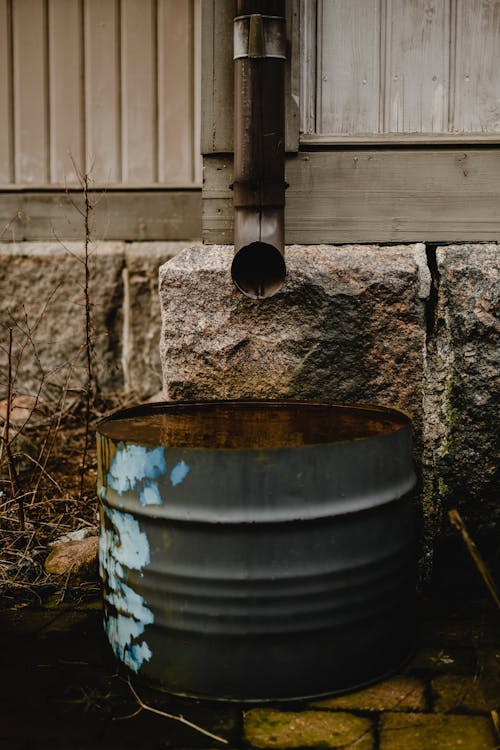
Rick stopped by one Saturday to help me get my first rain barrel set up. We placed a 55-gallon drum under the downspout coming off my workshop roof. The barrel cost $35 from a car wash supply store, and I picked up some fittings at Home Depot for $12. Overall, it came out to around $47.
That one barrel showed me what was possible. It filled up in a single afternoon thunderstorm. I used it to water my tomato plants for a week. Then it filled up again. Then I bought another barrel. Then two more. Then I said forget the barrels and bought a 275-gallon IBC tote for $75 from a guy on Craigslist.
Four years later, I’ve got a 1,500-gallon collection system with first-flush diverters, sediment filters, and a 12V pump that feeds my garden irrigation, chicken waterers, goat troughs, and my outdoor washing station. Water bill dropped from $187 to about $60 in the summer and $40 in winter.
Here’s everything I learned building it up, piece by piece, mistake by mistake.
How Much Water Your Roof Collects (It’s More Than You Think)
Before you buy anything, figure out how much water you can potentially harvest. The math is simple:
1 inch of rain on 1 square foot of roof = 0.623 gallons
So take your roof’s square footage (or the section you’re collecting from) and multiply by the inches of rain. My workshop roof is about 400 square feet. In a typical Florida thunderstorm that drops 1 inch of rain, that’s 400 x 0.623 = about 249 gallons. From ONE storm. From ONE roof section.
My whole house roof is about 2,200 square feet. One inch of rain = roughly 1,370 gallons. In a month where we get 8 inches of rain (typical Florida summer month), that’s nearly 11,000 gallons of water falling on my roof for FREE.
Now, you won’t capture all of it. Between first-flush diversion, overflow, and efficiency losses, figure 70-80% capture rate with a good system. But even at 70%, that’s 7,700 gallons per month in the rainy season. More than enough for irrigation, animals, and non-potable household use.
Calculate Your Roof's Collection Potential Before Buying Anything
Use the formula: roof square footage × annual rainfall inches × 0.623 × 0.75 (efficiency factor) = annual gallons. A 1,000 sq ft roof in an area getting 40 inches of rain per year can theoretically collect 18,690 gallons annually — enough for a garden, livestock, and outdoor use with storage to spare. Run the math for your area before sizing your storage.
The Basic System: How It All Connects
A rainwater harvesting system has five components, and they go in this order:
1. Collection surface (your roof). Metal roofs are the best collection surface — clean, smooth, no granules washing off. Asphalt shingle roofs work fine for garden and animal use but the granules do wash into your water. Tile roofs work but accumulate more debris. Treated wood shakes — don’t collect from these. The chemicals leach into the water.
For emergency water needs more broadly, check out our guide to water storage containers — some of the same principles apply.
2. Conveyance (gutters and downspouts). Standard aluminum gutters work. Clean them regularly — leaf buildup clogs the system and introduces organic material into your water. I installed gutter guards (the foam insert kind, $3 per 4-foot section at Lowe’s) and they cut my cleaning from monthly to twice a year.
3. First-flush diverter. This is the component most beginners skip and shouldn’t. The first water off your roof after a dry spell carries the most contamination — bird droppings, dust, pollen, insect debris, roofing material. A first-flush diverter captures the first 10-15 gallons (depends on roof size) and diverts it away from your storage.
I used a 4-inch PVC pipe, around 4 feet long, that connects to my downspout before the storage tank. This pipe holds roughly 4.5 gallons of dirty first-flush water. Once it fills up, a float inside rises and blocks the pipe, letting clean water flow into the tank. I spent about $18 on PVC fittings for this setup. You could also buy commercial models for $30 to $50, but they work just like mine.
4. Storage. This is where you keep the water, and your options range from a $15 trash can to a $2,000 underground cistern.
Options I’ve used:
- 55-gallon drums ($25-45 each). The entry point. Food-grade plastic, usually blue. Easy to find on Craigslist or Facebook Marketplace from car wash businesses, soda bottling plants, or food processors. Make sure they held food products, NOT chemicals. I started with two of these.
- 275-gallon IBC totes ($50-100 each). These are the big white/clear plastic cubes in a metal cage. Common in industrial settings. Great value per gallon of storage. I have three of these daisy-chained together. One caution: the clear ones promote algae growth if exposed to sunlight. Paint them or wrap them in a tarp. I spray painted mine dark green with exterior latex paint.
- Vertical polyethylene tanks (500-2,500 gallons, $200-800). Purpose-built water storage tanks. They look better, are designed for the job, and include proper fittings. When I eventually upgrade, I’ll go with a 2,500-gallon vertical tank from a company like Bushman or Norwesco.
Only Use Containers That Held Food or Water Products
IBC totes and barrels sourced secondhand can previously have held solvents, pesticides, or industrial chemicals that are nearly impossible to fully decontaminate. Before purchasing any used container, confirm exactly what it previously held. Food-grade containers (previously held syrup, vinegar, soda ingredients, water) are safe. Anything else is not worth the risk for water you’ll use on food crops or give to animals.
Right now my total storage is 1,500 gallons: three 275-gallon IBC totes (825 gallons) plus six 55-gallon drums (330 gallons) plus one 345-gallon stock tank I found at a farm auction for $40.
5. Distribution. How you get water from storage to where you need it.
Gravity works if your tank is elevated. Every foot of elevation gives you about 0.43 PSI of pressure. A tank on a 4-foot platform gives you enough pressure to fill a watering can or run a soaker hose slowly.
Need real pressure? Get a pump. I use a 12V RV demand pump (Shurflo brand, $75) powered by a small solar panel ($45). It gives me about 30 PSI, which is enough for drip irrigation lines and hose-end sprinklers. The pump runs on demand — when I open a valve, the pressure drop triggers the pump. When I close the valve, the pump shuts off. Simple, reliable, and solar-powered.
Filtration: How Clean Does It Need to Be?
This depends entirely on how you’re using the water.
Garden irrigation and animal water: Minimal filtration needed. A mesh screen on the gutter downspout to catch leaves and a first-flush diverter is sufficient. The plants and animals don’t care about minor sediment.
Household non-potable (toilet flushing, laundry, washing): Add a sediment filter. A simple 20-micron whole-house sediment filter ($25 for the housing, $5 for replacement cartridges) goes a long way. Change the cartridge every 3-6 months depending on water quality.
Drinking water: This is where it gets serious. Rainwater CAN be made potable but it requires proper filtration and disinfection:
- Sediment pre-filter (20 micron)
- Carbon block filter (1-5 micron, removes chemicals and improves taste)
- UV sterilizer or chlorine treatment (kills bacteria and parasites)
Rainwater Is Not Safe to Drink Without Proper Filtration
Even clean-looking rainwater can carry bacteria, viruses, parasites, bird and rodent waste, and atmospheric pollutants. For drinking water, you need at minimum a sediment filter, a sub-micron carbon block filter, and UV sterilization or chemical disinfection. Skipping any of these steps can leave biological or chemical contaminants in water that looks and tastes fine.
I do NOT currently use my rainwater for drinking. We’re on city water for potable use. But if the grid went down or we went fully off-grid, the system is designed so I can add a filtration stack. If you’re into off-grid water purification, those same methods work with harvested rainwater.
For now, I keep it simple: gutter screens, first-flush diverter, and a 100-mesh inline screen before the pump. That handles garden, animal, and outdoor washing needs without any issues.
My System Layout (Steal This Design)
Here’s exactly how my system is set up:
Workshop roof (400 sq ft) → aluminum gutters with foam guards → PVC downspout → first-flush diverter (4-inch PVC, 4 ft) → 100-mesh inline filter → three IBC totes daisy-chained with 2-inch PVC at the bottom → overflow pipe to garden swale
House roof (partial, 800 sq ft of the 2,200) → gutters → downspout → first-flush diverter → six 55-gallon drums connected at the bottom with 3/4-inch fittings → overflow to the stock tank → overflow to rain garden
The IBC totes feed the garden irrigation through the 12V pump. The drums feed the animal waterers by gravity (they’re on a 3-foot platform I built from cinder blocks and pressure-treated lumber).
Total system cost, accumulated over four years:
- Storage containers: ~$475
- PVC pipe and fittings: ~$120
- Gutter modifications: ~$45
- First-flush diverters: ~$36
- Pump and solar panel: ~$120
- Filters and screens: ~$35
- Platforms and stands: ~$80
- Miscellaneous hardware: ~$40
Total: approximately $950
My annual water bill savings: about $1,200-1,400 per year. So the system paid for itself in about 9-10 months.
Legal Stuff (Check Your State)
Rainwater harvesting legality varies by state and even by county. Most states allow it. Colorado used to restrict it heavily but loosened their laws in 2016. Some states actively encourage it with tax credits.
Florida — where I am — has no restrictions on residential rainwater harvesting. It’s explicitly legal. Some counties even offer rebates for rain barrel purchases.
Texas offers a property tax exemption for rainwater harvesting equipment. Virginia exempts rainwater harvesting systems from property taxes too.
Check your local regulations before building anything big. Some municipalities have rules about container placement, mosquito prevention (covered storage is usually required), and appearance. My HOA initially objected to the IBC totes until I painted them green and planted bamboo screening around them. Now they’re invisible from the street.
Mosquito Prevention (Non-Negotiable in Florida)
Standing water breeds mosquitoes. Period. Every opening in your storage system needs either a fine screen (window screen mesh works, or finer) or a sealed lid. No gaps. No exceptions.
I also use mosquito dunks — those little donut-shaped tablets of Bt (Bacillus thuringiensis) that kill mosquito larvae without affecting other organisms. One dunk per 100 gallons of standing water, replaced monthly. A six-pack is $10 at Home Depot and lasts all summer.
Building a system in the South?, take this seriously. Your neighbors will not appreciate a mosquito factory, and the health department can shut you down if you’re breeding mosquitoes in open containers.
Open Storage Containers Breed Mosquitoes in Warm Climates
Any exposed water surface will breed mosquitoes within days in summer. Every tank, barrel, and tote must be sealed with a lid or covered with fine mesh screen — no exceptions. Add Bti mosquito dunks (one per 100 gallons monthly) as backup insurance. In the South, an uncovered rainwater system can produce enough mosquitoes to draw complaints from neighbors within two weeks.
Scaling Up: What I’d Do Differently
Starting from scratch today with what I know now:
Start with a bigger storage tank. The 55-gallon drums were fine for learning but they’re inefficient at scale. One 500-gallon vertical tank costs about the same as ten 55-gallon drums but takes up less space, has fewer connections to potentially leak, and looks way better.
Install the first-flush diverters on day one. I ran for six months without them and the water was noticeably dirtier. The difference in water quality with even a simple first-flush setup is dramatic.
Plan for expansion. Run your plumbing with tees and valves so you can add more storage later without redoing the whole system. I’ve replumbed my workshop side twice because I didn’t think ahead.
Integrate with other systems. If you’re running solar power, the pump can run off the same battery bank. If you’re running a garden, the overflow can go into rain gardens or swales for passive irrigation. Everything connects if you plan it right.
The $187 water bill feels like it was from another lifetime. My roof collects more water than I can use most months. The garden has never looked better. The goats have clean water. The chickens have clean water. And every time it rains, I don’t think “there goes my afternoon” — I think “there goes free water.”
Rick was right at every cookout. I should have listened sooner.
If you’re thinking about going fully off-grid, rainwater is just one piece of the puzzle. Our complete guide to off-grid living covers everything from solar power to waste systems to the hidden costs nobody warns you about.