This article contains affiliate links. We may earn a small commission if you purchase through these links, at no extra cost to you.
September 2019, somewhere in the Cascades above 6,000 feet. A week of glacier melt and afternoon storms had pushed a stream that should’ve been knee-deep into something closer to chest-deep and moving fast enough that I could hear rocks grinding along the bottom.
I stood there for 20 minutes before I crossed. Scouted upstream and downstream. Found a wider, shallower section about 400 meters north. Crossed there in 90 seconds, knee-deep, no drama.
The scout and the patience — those aren’t instincts. Those are trained responses. And they’re the difference between a successful crossing and a very bad day that may or may not end with a helicopter.
River crossings kill people in the backcountry every year. Most of those deaths happen because someone crossed at the wrong spot, at the wrong time, with the wrong approach. This guide covers how to make crossing decisions and execute them correctly.
Table of Contents
- Never Cross When You Don’t Have To
- Reading the Water Before You Step In
- Choosing the Best Crossing Point
- Techniques for Wading Safely
- Group Crossings
- If You Go In
- Gear Considerations
- Timing and Seasonal Factors
Never Cross When You Don’t Have To {#when-not-to-cross}
Start here. Every crossing is risk. Some crossings are acceptable risk. Some aren’t.
Is there a bridge within reasonable distance? A log crossing? A narrower section? A place where the water fans out into multiple shallow channels instead of one deep main current? Scout for alternatives before committing to any wet ford.
Conditions that should make you serious about turning back or waiting:
- Glacial melt streams in the afternoon. Glaciers melt through the day. A stream that’s crossable at 7 AM may be uncrossable by 2 PM. Cross early on melt-fed drainages.
- After significant rain. Water levels can rise dramatically in hours. A stream that looked crossable when you passed the trailhead yesterday is not the same stream today.
- Silty, opaque water. If you can’t see the bottom, you don’t know what you’re stepping into. Depth estimation becomes guesswork.
- Loud water that sounds like grinding rock. That noise is boulders moving. That current will move you too.
When I’m genuinely uncertain, I wait. Camp, make coffee, let the sun get lower and the glacier melt cool down. Rivers rise and fall, and patience has gotten me across plenty of crossings that looked impassable in the morning.
Reading the Water Before You Step In {#reading-water}
Water behavior follows physics, and if you spend time watching rivers you start to see the patterns.
Current speed indicators:
- Rippled surface = relatively slow, shallow
- Smooth but fast-looking = deeper, steadier current
- Whitewater/churning = rocks below surface, turbulent — worst for crossing
- Boils and eddies = underwater obstacles deflecting current upward
Depth indicators:
- Color: darker water is generally deeper
- Ripple patterns: riffles (shallow, choppy) vs. pools (deeper, smoother)
- Bank height: if the banks are high and vertical, the water has cut deep
The current force calculation: Water force isn’t linear — it’s exponential relative to speed. Water moving at 3 mph pushes with roughly 3-4 times the force of water moving at 1 mph, due to the drag equation (force scales with velocity squared). At around 7-8 mph current — fast but not extreme — standing in waist-deep water takes almost all your available footing strength just to maintain position. Most people don’t think about this until they’re mid-stream and suddenly can’t move forward or back.
What to look for:
- Upstream and downstream view of the crossing: identify obstacles you could get pinned against if you fall
- Downstream hazards: strainers (logs or debris that water flows through but bodies can’t), hydraulics at the base of drops, undercut banks
- Exit points on the far bank: can you actually get out on the other side?
Pro Tip: Throw a stick in the water and watch it. Time how long it takes to travel a fixed distance. That gives you a rough estimate of current speed and shows you where the main current runs vs. the calmer edges.
Choosing the Best Crossing Point {#choosing-spot}
Wider and shallower beats narrow and deep, always. A river that’s 40 meters wide and knee-deep is far easier to cross than the same water forced through a 10-meter channel at chest depth.
Look for:
- Braided sections: where the river splits into multiple channels, each is shallower and slower
- Inside bends: the current is slower on the inside curve of a bend; the outside cut bank is deeper and faster
- Gravel bars: shallow, stable footing, predictable depth
- Just above a visible rapid: water slows and shallows above drops — cross there, not at or below the rapid
- Riffles: shallow, rocky bottom sections with visible rippling. Depth is manageable and you can see the bottom.
Avoid:
- Deep pools with no visible bottom
- Just below a rapid: that’s where the current is most powerful
- Areas with logs or debris in the water: strainer risk
- Cut banks: unstable, deep water right at the edge
Once you’ve selected your spot, stand and watch it for 5 minutes. Watch where the current runs hardest. Plan your line from bank to bank before you enter.
Techniques for Wading Safely {#wading-techniques}
Body position: Face upstream at a 45-degree angle — not directly upstream, not directly across. This presents less body surface area to the current and gives you better stability. Shuffle-step sideways, moving downstream foot first.
Never cross your feet — it creates a moment of single-leg balance that current can exploit to knock you down.
Trekking poles: I almost never cross a serious river without trekking poles. Plant the pole upstream, creating a tripod with your two legs. Move one leg forward, re-plant the pole. Repeat. The pole adds a third point of contact and lets you probe depth and bottom stability before committing weight.
If you’re using a pack, loosen all the straps — hip belt especially. If you go down, you need to be able to get out of the pack immediately. A full pack pinned by current acts as a sail and will push you underwater. Drowning while trapped in a pack is how people die in crossings.
Depth limit: For most people, thigh-deep in moderate current is approaching the limit of safe solo wading. Waist-deep in any significant current is genuinely dangerous. If the water is above your waist and moving fast, you should be looking for another option.
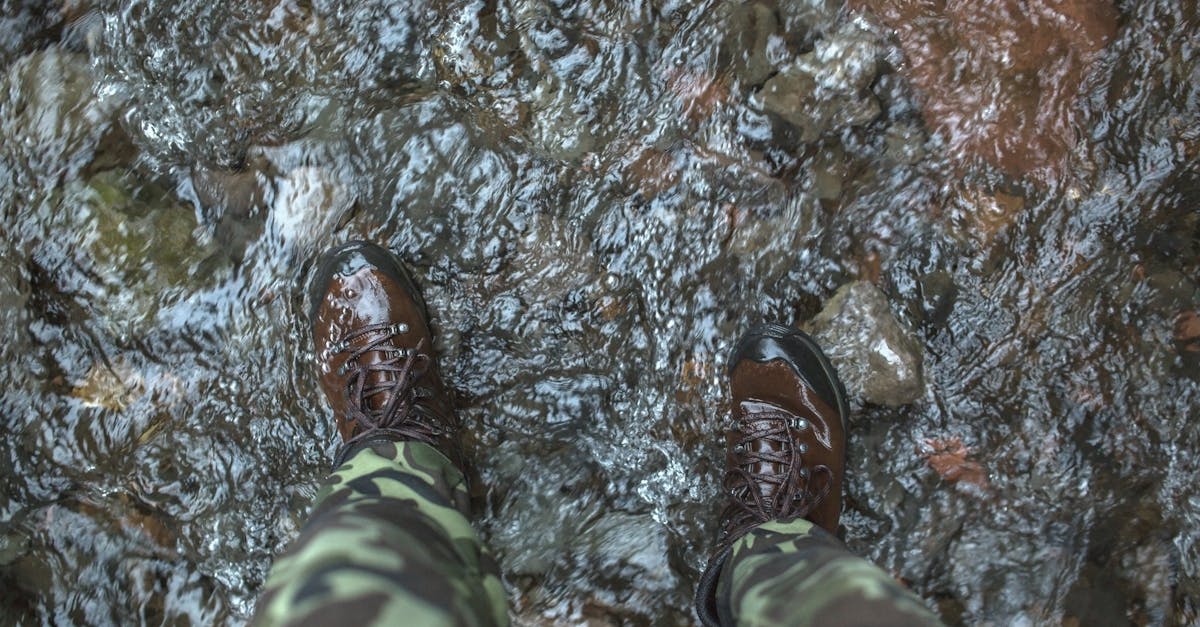
Footwear: Keep your boots on. I know it seems logical to take them off to keep them dry. Don’t. You need ankle support on a slippery bottom, and you can dry boots much more easily than you can recover from a twisted ankle mid-river. I tie my laces extra tight before entering water — loose boots are worse than no boots.
Group Crossings {#group-crossings}
Three or more people can use a huddle formation that creates significant stability. Everyone grabs the shoulders or pack of the person next to them. The strongest person goes upstream. You move as a unit, slow and deliberate.
Two-person crossings: face each other, grab wrists or forearms, not hands. Move together, communicating each step. One person moves while the other stabilizes.
The line formation — single file, each person gripping the pack of the person in front — works but is less stable than a side-by-side huddle for strong current.
If You Go In {#if-you-fall}
Don’t panic. Easier said than done, but the next few seconds of decision-making matter a lot.
Defensive swimming position: Roll onto your back, feet pointing downstream, toes up. This lets you push off rocks with your feet rather than taking impacts headfirst. Your feet act as bumpers.
Get to shore: Angle toward the nearest bank on a ferry angle — not swimming directly toward shore (current will push you back) but angling your body and kicking to use the current to help carry you toward the bank.
Ditch the pack: If you’re being pulled under, get out of the pack. Even a 30-liter daypack full of wet gear weighs enough to push you down.
Strainers: If you’re heading toward a log or debris pile that water flows through — your biggest priority is getting over it, not trying to fight the current away from it. Swim aggressively toward the strainer and try to get your body up on top of it. Getting pushed against a strainer from below is extremely dangerous.
Read more on cold water shock and hypothermia risk in the cold weather survival guide — immersion in snowmelt rivers is a hypothermia situation even on a warm day.
Gear Considerations {#gear}
Common Mistakes with Gear:
- Not loosening the hip belt before crossing — this is the most important one. Lose the pack weight fast if you go in.
- Removing boots to “stay dry” — you need the grip and ankle support more than you need dry feet.
- Not carrying trekking poles — they add too much stability to skip.
- Cinching up all pack straps tight — do the opposite before a crossing.
- Crossing with trekking pole wrist loops on — take your hands out of the loops so you can drop the poles if you go in.
A dry bag for critical gear (phone, fire kit, sleeping bag) is good practice any time water is involved. Electronics don’t need to swim just because you do.
Timing and Seasonal Factors {#timing}
Snowmelt rivers: Highest flow is typically early afternoon in late spring and early summer as temperatures peak. Cross in early morning when overnight cooling has slowed melt. A crossing that’s calf-deep at 7 AM might be thigh-deep by 2 PM.
Monsoon drainages in the Southwest: Flash flood risk from storms that are miles away and not visible. Check weather for the entire drainage — water can rise with no warning in bone-dry canyons. If it looks like it might rain anywhere upstream, don’t commit to a desert canyon crossing.
Fall storms: Rain events can raise rivers dramatically in 2-4 hours. If weather is uncertain and you’re planning multiple crossings, be conservative — getting in is one thing, getting back out the next day is another problem entirely.
Spring: Snowmelt combined with rain events can create flood conditions quickly. Know the snowpack situation for the area you’re entering.
The Cascade crossing in 2019 — I found a section 400 meters north where the river fanned out into three channels, the deepest being mid-thigh. Took me 90 seconds total. The original crossing point, where the trail hit the river, would have been chest-deep in fast water.
Those 400 meters of scouting were the best hiking I did all trip.
Learn to read water before you trust water. The river doesn’t care about your timetable, and it’s not impressed by confidence.