This article contains affiliate links. We may earn a small commission if you purchase through these links, at no extra cost to you.
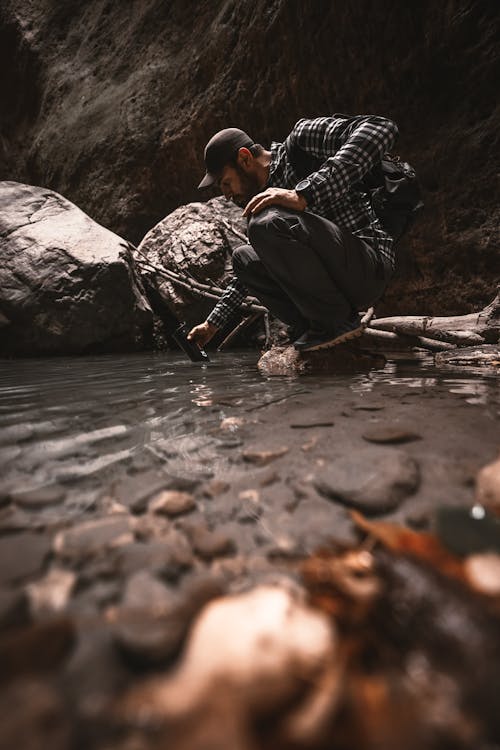
Let me tell you about the time my eight-year-old drank straight from a creek on a family hike because “it looked clean” and I didn’t catch him fast enough. Nothing happened, thank God. But I spent the next 48 hours monitoring him like a hawk and googling “giardia symptoms in children” at 1 AM while everyone else slept.
That was my wake-up call. I’d been casually building our emergency preparedness supplies for a couple years at that point — food, first aid, flashlights — but I’d been lazy about water. I had storage containers stacked in the garage, sure. But I had no real plan for what happens when the stored water runs out and you’re dealing with questionable sources.
So I researched it properly. Talked to our county health department. Read the CDC and WHO guidelines. Tested several products myself. And now I have opinions, because that’s what happens when a mom gets worried about something.
Table of Contents
- Why This Matters: What’s Actually in Untreated Water
- Method 1: Boiling (The Gold Standard)
- Method 2: Chemical Treatment — Bleach
- Method 3: Chemical Treatment — Purification Tablets
- Method 4: Portable Water Filters
- Method 5: UV Purification
- Method 6: DIY Methods (When You Have Nothing Else)
- Which Method Do I Trust With My Kids?
- Building Your Water Purification Kit
Why This Matters: What’s Actually in Untreated Water
That “clean-looking” creek my son drank from? Here’s what can live in clear, cold, flowing water: Giardia lamblia (parasitic cyst that causes weeks of violent diarrhea), Cryptosporidium (same deal, resistant to chlorine), E. coli, Salmonella, hepatitis A virus, and various other organisms that would make a microbiology textbook feel like a horror novel.
You cannot see them. You cannot smell them. You cannot taste them. Crystal-clear mountain water can absolutely make you sick. Animal waste, agricultural runoff, and natural contamination can be present in water that looks pristine.
In a true emergency — natural disaster, infrastructure failure, extended power outage — municipal water treatment may stop functioning. Boil-water advisories happen after hurricanes, earthquakes, and flooding. When that happens, you need to handle purification yourself. For your family, not just yourself.
Clear Water Is Not Safe Water
Waterborne pathogens like Giardia, Cryptosporidium, E. coli, and hepatitis A virus are invisible to the naked eye. Crystal-clear mountain streams, filtered-looking tap water during a boil advisory, and rain collected in clean containers can all harbor organisms that will make you seriously ill. Appearance is not a safety indicator. Always treat water from any unverified source.
What you’re up against, ranked by how hard they are to kill:
Bacteria (E. coli, Salmonella, cholera) — boiling, chemicals, UV, and filters all handle these. Easiest to deal with.
Viruses (hepatitis A, rotavirus, norovirus): Killed by boiling, chemicals, and UV. Most portable FILTERS do not remove viruses — the pores are too large. This matters.
Protozoan cysts (Giardia, Cryptosporidium): Killed by boiling, UV, and filters. Cryptosporidium is resistant to chlorine at normal concentrations. This is important and I’ll come back to it.
Chemical contaminants (pesticides, heavy metals, fuel): Not removed by boiling, chemicals, or UV. Only activated carbon filtration or reverse osmosis handles these. Most portable filters include activated carbon but won’t remove heavy metals.
No single method handles everything. That’s why I recommend layering methods, which I’ll get to.
Method 1: Boiling (The Gold Standard)
Boiling kills every biological contaminant — bacteria, viruses, protozoan cysts, all of it. The CDC recommends a rolling boil for one full minute (three minutes above 6,500 feet elevation because water boils at a lower temperature at altitude). After that, it’s safe.
Pros: Kills everything biological. Free if you have fuel and a pot. No special equipment needed. Works on any water source. Zero learning curve.
Cons: Requires fuel (a real limitation in an extended emergency). Takes time — heating water, boiling for a minute, then cooling enough to drink. Doesn’t remove chemical contaminants or improve taste. Requires a heat-safe container.
Cost: Nothing beyond what you already own. A basic pot and a heat source.
Bottom line: Method number one, always. If you have fuel and a container, boil your water. It’s the most reliable method that exists and the one I trust without reservation for my kids. The downside is that it’s slow and fuel-dependent. On a camping trip where you’re already running a stove, it’s effortless. In a long-term grid-down scenario, fuel becomes precious and you need alternatives.
Pro Tip: Let boiled water cool in a clean, covered container. Don’t pour it back and forth between containers to cool it faster — that introduces potential contaminants from your hands and the receiving container.
Method 2: Chemical Treatment — Bleach
Regular unscented household bleach (sodium hypochlorite, 6-8.25% concentration) is a proven water disinfectant. The CDC, WHO, and EPA all endorse it.
The ratio: 2 drops of 8.25% bleach per liter of clear water. If the water is cloudy, double it to 4 drops. Stir and wait 30 minutes. You should smell a faint chlorine odor. If you don’t, add another 2 drops and wait 15 more minutes.
For larger quantities: 1/8 teaspoon per gallon of clear water.
Upside: Dirt cheap — a $4 bottle of bleach can treat thousands of gallons. Lightweight. Kills bacteria and most viruses. Long shelf life (about 6-12 months for liquid bleach; replace it annually).
Downside: Does NOT reliably kill Cryptosporidium. Taste is noticeable (though not terrible). Doesn’t remove chemical contaminants. You need to measure carefully — too little doesn’t disinfect, too much can cause stomach irritation. Bleach degrades over time, so old bleach may not work.
Price tag: Under $5 for enough bleach to treat hundreds of gallons.
Write Bleach Dosing Instructions on the Bottle
In a stressful emergency, you will not remember the exact dose — 2 drops per liter of clear water, 4 drops if cloudy. Write the instructions directly on your bleach bottle with a Sharpie before an emergency, so you can follow them correctly under pressure. Use ONLY plain unscented sodium hypochlorite bleach at 6–8.25% concentration.
Honest assessment: Excellent backup method. I keep a small bottle of unscented bleach in my emergency kit with the dosing instructions written on it in Sharpie (because I will NOT remember 2 drops per liter when I’m stressed). The Cryptosporidium gap is the concern. In most urban emergency scenarios — boil-water advisories after storms — the main risks are bacteria and viruses, and bleach handles those. For backcountry water where Crypto is more likely, use a different method or combine bleach with filtration.
Important: Only use PLAIN, unscented bleach. No “splash-less,” no color-safe, no added fragrances. Just sodium hypochlorite and water. Check the label.
Method 3: Chemical Treatment — Purification Tablets
These are pre-measured chemical tablets — mostly iodine or chlorine dioxide — that dissolve in water.
Iodine tablets (Potable Aqua, about $8-$12 for 50 tablets): Add two tablets per liter, wait 30 minutes. Kills bacteria and viruses. Partially effective against Giardia. Not reliable against Cryptosporidium. Leaves an iodine taste that most people find unpleasant — the companion “PA Plus” neutralizer tablets help with taste.
Chlorine dioxide tablets (Katadyn Micropur MP1, about $13-$15 for 30 tablets): These are the better option. Chlorine dioxide at sufficient concentration and wait time kills bacteria, viruses, AND Cryptosporidium. The catch: it takes 4 hours to kill Crypto. For bacteria and viruses, 30 minutes is enough. So for full-spectrum protection, you’re waiting 4 hours. Most people won’t do that when they’re thirsty.
Going for it: Incredibly lightweight. Five-year shelf life (sealed). No equipment needed — just drop in water. Great for bug-out bags.
Trade-offs: Wait time (especially the 4-hour Crypto window for chlorine dioxide). Taste. Per-liter cost is higher than bleach. Iodine isn’t safe for pregnant women, people with thyroid conditions, or for long-term use (more than a few weeks).
What you’ll spend: $8-$15 for 30-50 treatments. About $0.30-$0.50 per liter.
Where these live in our house: Every emergency kit has a pack of Katadyn Micropur tablets and every family member’s bug-out bag. They weigh nothing, last years in storage, and they work. They’re my backup to the backup. Not my primary method — the wait time is too long for daily use with three thirsty kids — but for a grab-and-go scenario, nothing beats the convenience.
Method 4: Portable Water Filters
This is where most people start, and for good reason. Portable filters are fast, effective, and don’t require fuel or chemicals.
Pump filters like the Katadyn Hiker Pro ($70-$85): You pump water through a ceramic or hollow-fiber membrane. Flow rate of about 1 liter per minute. Removes bacteria, protozoa, and sediment. Most include activated carbon for taste improvement. Reliable, proven technology. The downside is weight (11 oz for the Hiker Pro) and mechanical parts that can fail.
Squeeze filters like the Sawyer Squeeze ($30-$35): Fill the bag, squeeze water through the filter. Removes bacteria and protozoa down to 0.1 micron. Weighs 3 oz. Filters up to 100,000 gallons before replacement (Sawyer’s claim — real-world longevity depends on water clarity and maintenance). This is probably the best value in portable water filtration right now.
Straw filters like the LifeStraw ($15-$20): Drink directly from the source through the filter. Removes bacteria and protozoa. Weighs 2 oz. Filters about 1,000 gallons. Cheap and light. The limitation is that you can’t filter water into a container — you drink directly from the source. Not practical for cooking or filling bottles for later (though LifeStraw makes bottle versions that solve this).
Gravity filters like the Platypus GravityWorks 4L ($100-$120): Hang one bag high, gravity pulls water through the filter into a lower bag. No pumping, no squeezing. Filters 4 liters in about 2.5 minutes. Excellent for families and groups because you can filter a large volume while doing other things.
Most Portable Filters Do Not Remove Viruses
Standard hollow-fiber filters like the Sawyer Squeeze remove bacteria and protozoa but cannot filter viruses — viruses are smaller than the filter pores. In North American wilderness this is usually acceptable, but after floods, sewage contamination, or in any situation with human waste near the water source, you need a method that handles viruses too. Combine filtration with chemical treatment or UV to cover all threats.
Critical limitation of ALL portable filters: Most do not remove viruses. Hollow fiber and ceramic filters have 0.1-0.2 micron pores. Bacteria are 0.2-5 microns. Protozoan cysts are 1-15 microns. Viruses are 0.02-0.3 microns. See the problem? Viruses are smaller than the filter pores.
For North American backcountry use, this is generally considered acceptable because waterborne viral contamination is rare in wilderness settings here. In developing countries, post-disaster urban scenarios, or any situation with sewage contamination, you need a purifier (not just a filter) that handles viruses — or combine filtration with chemical treatment or UV.
Damage: $15-$120 depending on type.
Real-world verdict: The Sawyer Squeeze is in our family hiking bag permanently. At $30, it’s the best dollar-per-safety-point investment in water treatment. For home emergency kits, I use the Platypus GravityWorks because it handles volume without anyone standing there pumping. When I’m filtering water for my kids, I run it through the Sawyer first and then treat with Micropur tablets. Belt and suspenders. That’s how I sleep at night.
Method 5: UV Purification
UV-C light at 254 nanometers destroys the DNA of microorganisms, preventing them from reproducing. It kills bacteria, viruses, AND protozoan cysts. It’s one of the few portable methods effective against all three.
The SteriPEN ($50-$100 depending on model) is the main consumer product. Dip the UV lamp into a liter of water, stir for 90 seconds, done. Kills 99.9% of everything biological.
Pros: Fast (90 seconds). Kills viruses, which filters miss. No chemicals, no taste change. Lightweight.
Cons: Requires batteries or USB charging (our resident tech nerd would have thoughts about power management here). Only works on clear water — sediment blocks UV penetration. If the water is turbid, you need to pre-filter or let sediment settle first. The lamp is a glass bulb that can break. Doesn’t remove chemical contaminants or particles.
Cost: $50-$100 for the device, plus ongoing battery or charging costs.
My take: I like it as a complement to filtration. Filter first to remove sediment and protozoa, then UV treat to kill viruses. That combination handles everything biological. The battery dependency makes me nervous for extended emergencies, though. If I had to pick one method for a scenario where I couldn’t recharge anything, it wouldn’t be this one. But paired with a solar charger or fresh batteries, it’s excellent.
Method 6: DIY Methods (When You Have Nothing Else)
When resources are scarce—no filter, no chemicals, no fuel—you must rely on less conventional methods that come with significant limitations.
SODIS (Solar Water Disinfection): Fill a clear PET plastic bottle (like a soda bottle) with water and leave it in direct sunlight for 6+ hours (or two days if cloudy). UV-A from the sun and heat work together to kill most pathogens. WHO-endorsed for developing regions. It works — but slowly, and not against Crypto in cold conditions.
Sediment settling and cloth filtering: Let water sit for several hours so heavy particles settle. Pour through a clean cotton cloth (t-shirt, bandana) folded several times. This removes large parasites, sediment, and some bacteria. It does NOT make water safe to drink. It’s a pre-treatment step that makes other methods work better.
DIY sand/charcoal filter: Layer gravel, sand, and crushed charcoal (from a hardwood fire, not briquettes) in a container with a drain hole. Pour water through. The charcoal adsorbs some chemicals and improves taste, the sand catches sediment and some bacteria. This was used historically and still works in a pinch. But it doesn’t reliably kill viruses or all bacteria. Treat it as pre-filtration, not purification.
My take: These methods are better than drinking untreated water, but none of them are reliable enough that I’d hand a cup to my kids and feel good about it. SODIS comes closest to a standalone method, but the time requirement and weather dependency make it impractical as a primary option. If I’m truly desperate, SODIS plus cloth pre-filtering is what I’d do. But I’d rather spend $30 on a Sawyer filter and keep it in my bag so I never have to find out.
Which Method Do I Trust With My Kids?
Here’s my honest ranking, specifically from a “I’m handing this water to a child” perspective:
- Boiling — 100% confidence. If I can boil it, I will.
- Filter + UV — Filter through Sawyer, then SteriPEN. Covers everything biological.
- Filter + chlorine dioxide tablets — Sawyer plus Micropur. Wait the full 4 hours for Crypto protection.
- Filter alone — Sawyer or equivalent. Adequate for most North American water sources.
- Bleach — Effective for most pathogens, but the Crypto gap concerns me with kids.
- Tablets alone — Works, but I prefer filtration first to remove sediment.
- UV alone — Only if the water is clear. Too dependent on battery and water clarity.
- DIY methods — Absolute last resort.
Building Your Water Purification Kit
Here’s what I actually keep in our family emergency supplies. Total cost: about $80.
Home kit (for power outages and boil-water advisories):
- Large pot for boiling (already own it)
- Platypus GravityWorks 4L filter ($110 — investment piece)
- Bottle of unscented bleach with dosing instructions written on it ($4)
- Pack of Micropur tablets ($13)
- Written instructions laminated in a zipper bag (free)
Each person’s go-bag:
- Sawyer Squeeze filter with one squeeze bag ($30)
- 10 Micropur tablets in a zipper bag ($4)
- LifeStraw as backup ($15)
Vehicle kit:
- Sawyer Squeeze ($30)
- Small bottle of bleach ($2)
- Micropur tablets ($13)
Backflush Your Sawyer Filter After Every Use
The Sawyer Squeeze loses flow rate over time as debris clogs the hollow fibers. Backflushing — pushing clean water backward through the filter — restores flow rate and extends filter life dramatically. Sawyer includes a syringe for this purpose. Do it after every field use and before long-term storage. A filter that hasn’t been backflushed may feel clogged when you need it most.
Redundancy is intentional. If one method fails — broken filter, dead SteriPEN battery, ran out of tablets — you have another option. Water is the one supply you cannot improvise your way around. A person can survive three days without it. Kids less.
Between proper water storage at home and a rainwater harvesting setup if you have the space, plus a solid purification kit, you’re covered for anything from a 24-hour boil advisory to a much longer disruption. The peace of mind alone is worth the $80.
Start with the Sawyer Squeeze and a pack of tablets. That’s $43 and covers 90% of scenarios. Add from there as your budget allows. But start somewhere, because “that creek looked clean” is not a water purification plan.